

Stop the Leak First, Then Make a Lasting Copper Pipe Repair
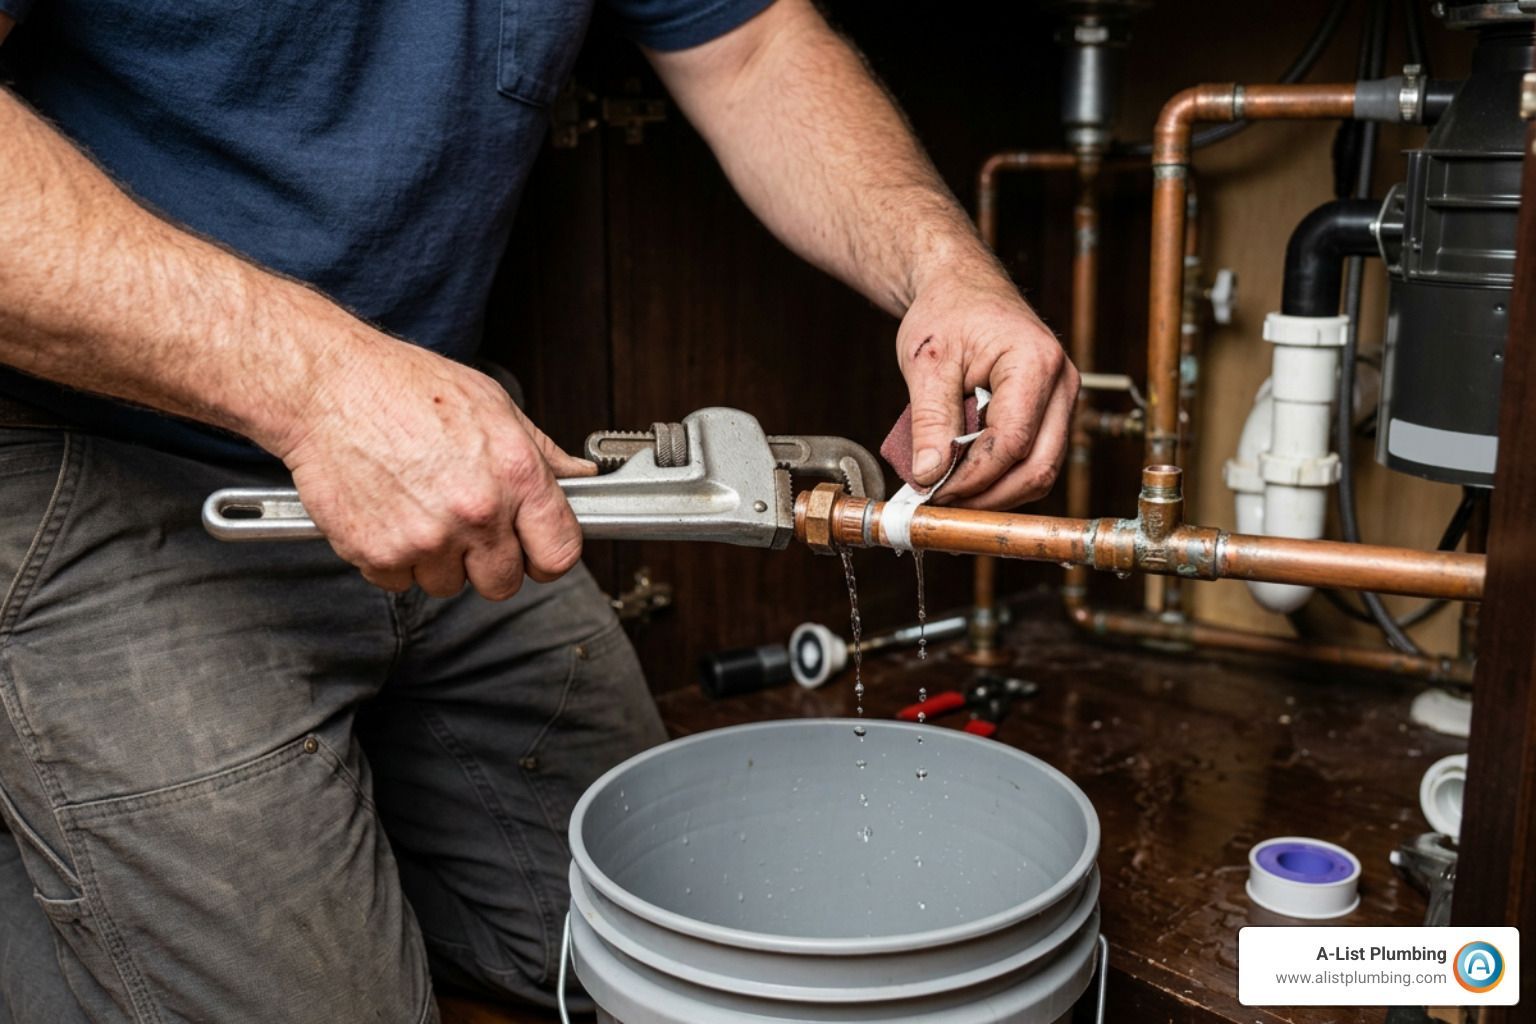
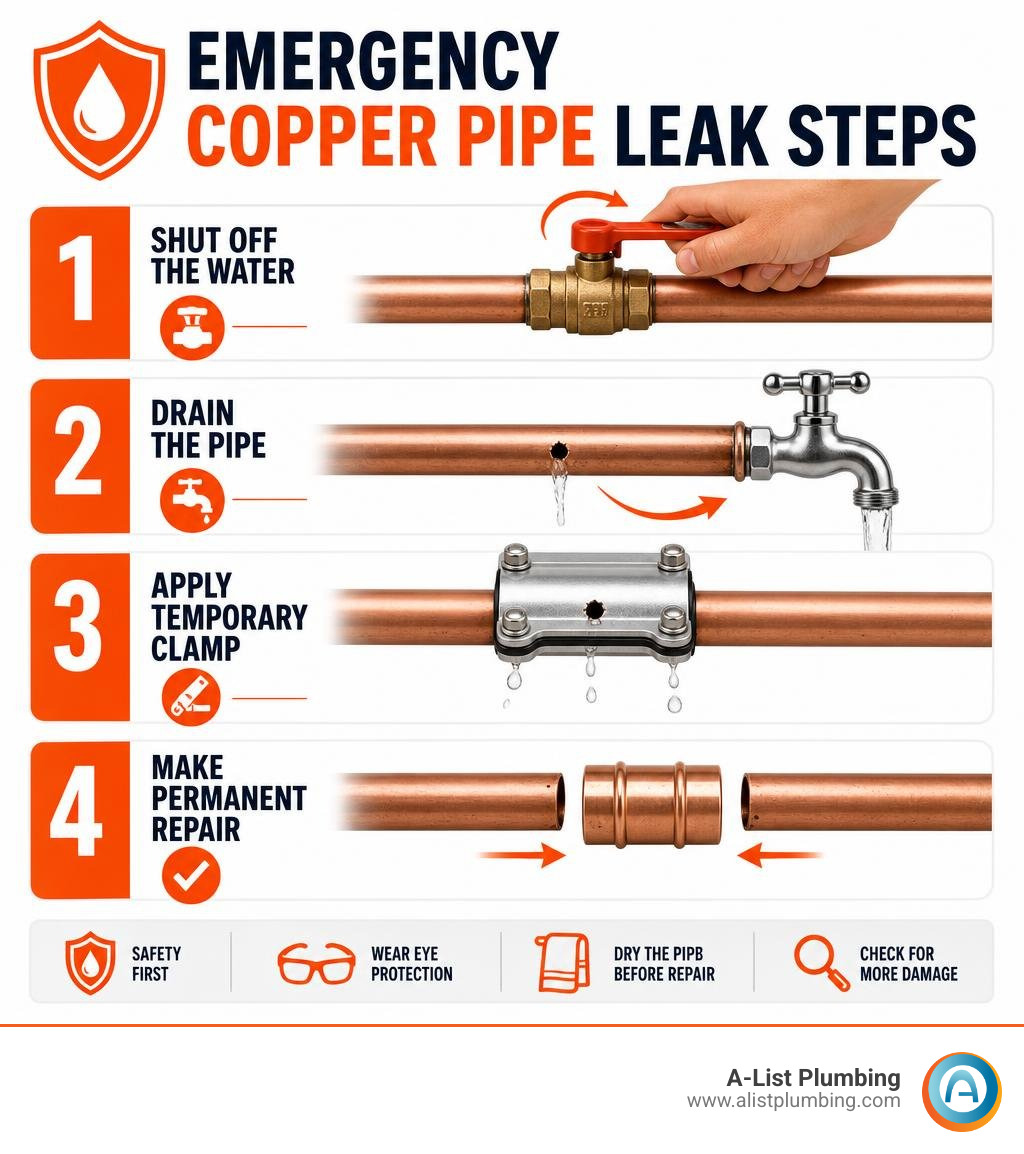
When it comes to fixing a hole in copper pipe, the game plan is straightforward: shut off your main water valve right away, open up a nearby faucet to drain the line and dump the pressure, and wipe the pipe completely dry. A quick clamp or some epoxy putty can buy you some time, but if you want a fix that actually lasts, you'll need to cut out the bad section and pop in either a push-to-connect fitting or a good old soldered copper coupling.
Whatever you do, don't try soldering a pipe with water still trickling inside. Even a tiny bit of moisture steals the heat and ruins your solder joint every single time. If your leak is right up against wood studs, insulation, or electrical wires—or if you spot multiple pinholes popping up—skip the blowtorch and give a pro a call.
I'm Heath Shockman, and I've run A-List Plumbing since 2011. I've spent years getting my hands dirty fixing copper pipes and tracking down whatever nasty water chemistry or pressure spike caused them in the first place. Let's walk through how to figure out if you're dealing with a basic pinhole, freeze damage, or a bigger plumbing headache.
Diagnosing Copper Pipe Leaks and Underlying Causes
Nobody likes finding a puddle under their plumbing. Even though copper pipes can easily hang in there for 50 to 70 years, they aren't bulletproof. When you spot a leak, figuring out why it happened is the only way to keep it from popping up somewhere else tomorrow.
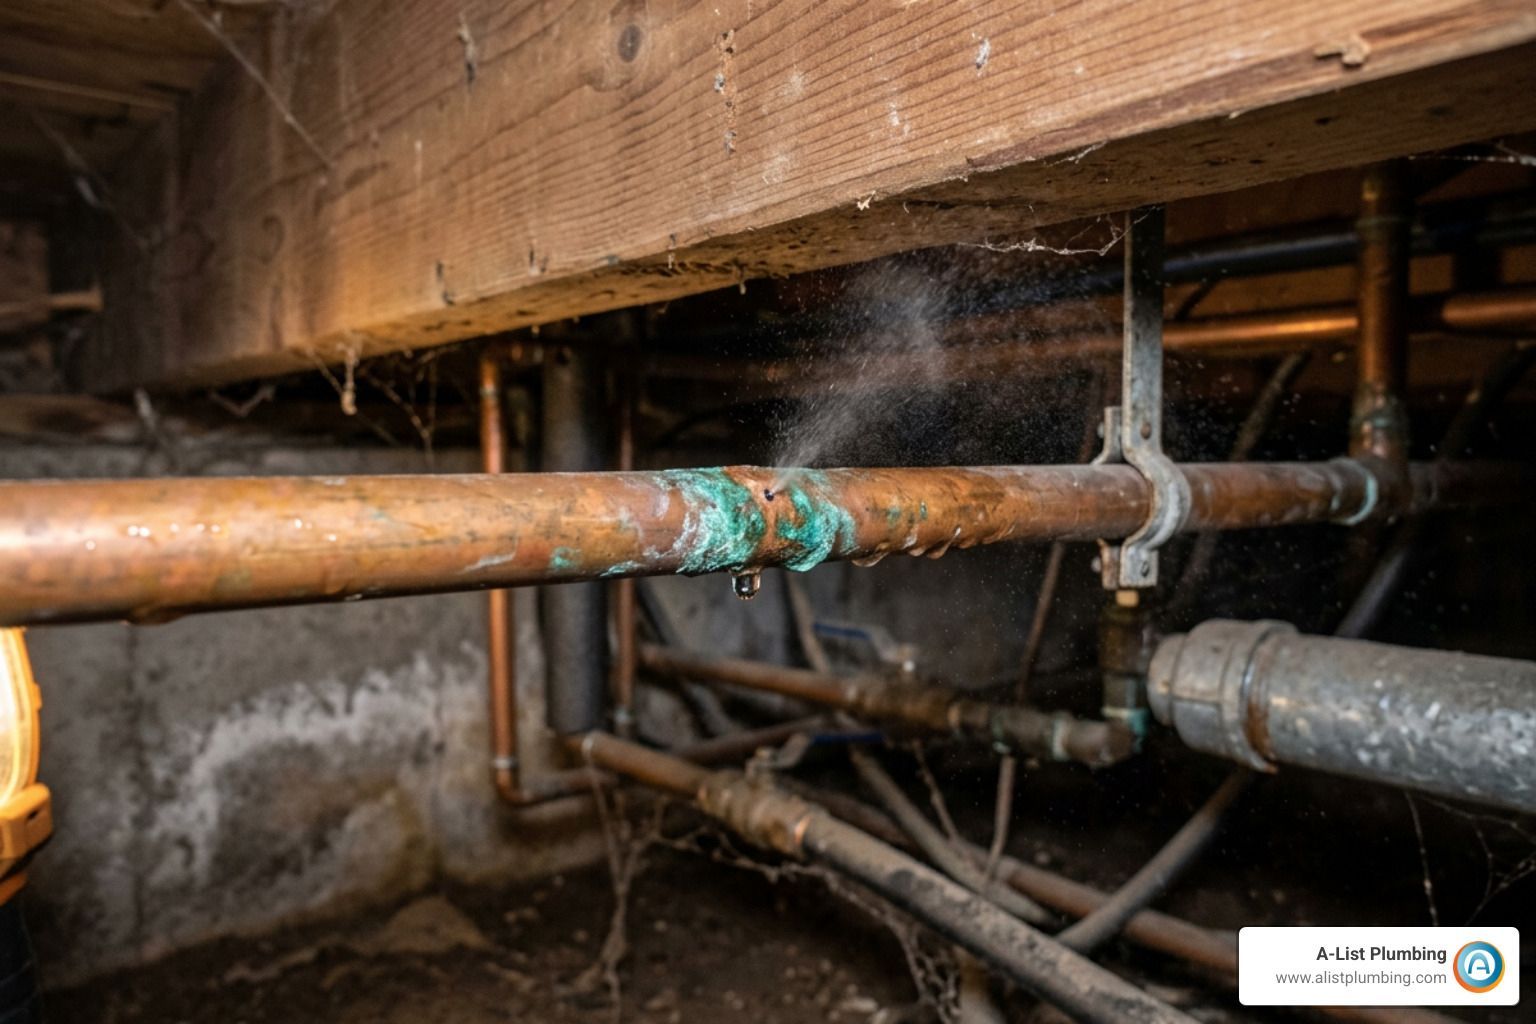
Most copper leaks come down to internal pitting corrosion. Over the years, aggressive water—especially acidic water outside the sweet spot of 6.5 to 8.5 pH—eats tiny craters right through the pipe wall. High water velocity, turbulent flow around sharp turns, and crazy water pressure over 60 to 80 PSI can strip away the copper's protective inside coating too.
You also see galvanic corrosion happen when bare copper touches other metals without dielectric unions. On the outside, you might spot crusty green buildup around weak spots. If you think there's hidden water chewing through your drywall, our verified Services/Leak Detection team can track down the exact trouble spot with no broken links to worry about. For a deeper dive into the science behind pipe wear, check out this verified resource on industry research on copper pipe failure.
Identifying Pinhole Leaks vs. Freeze Bursts
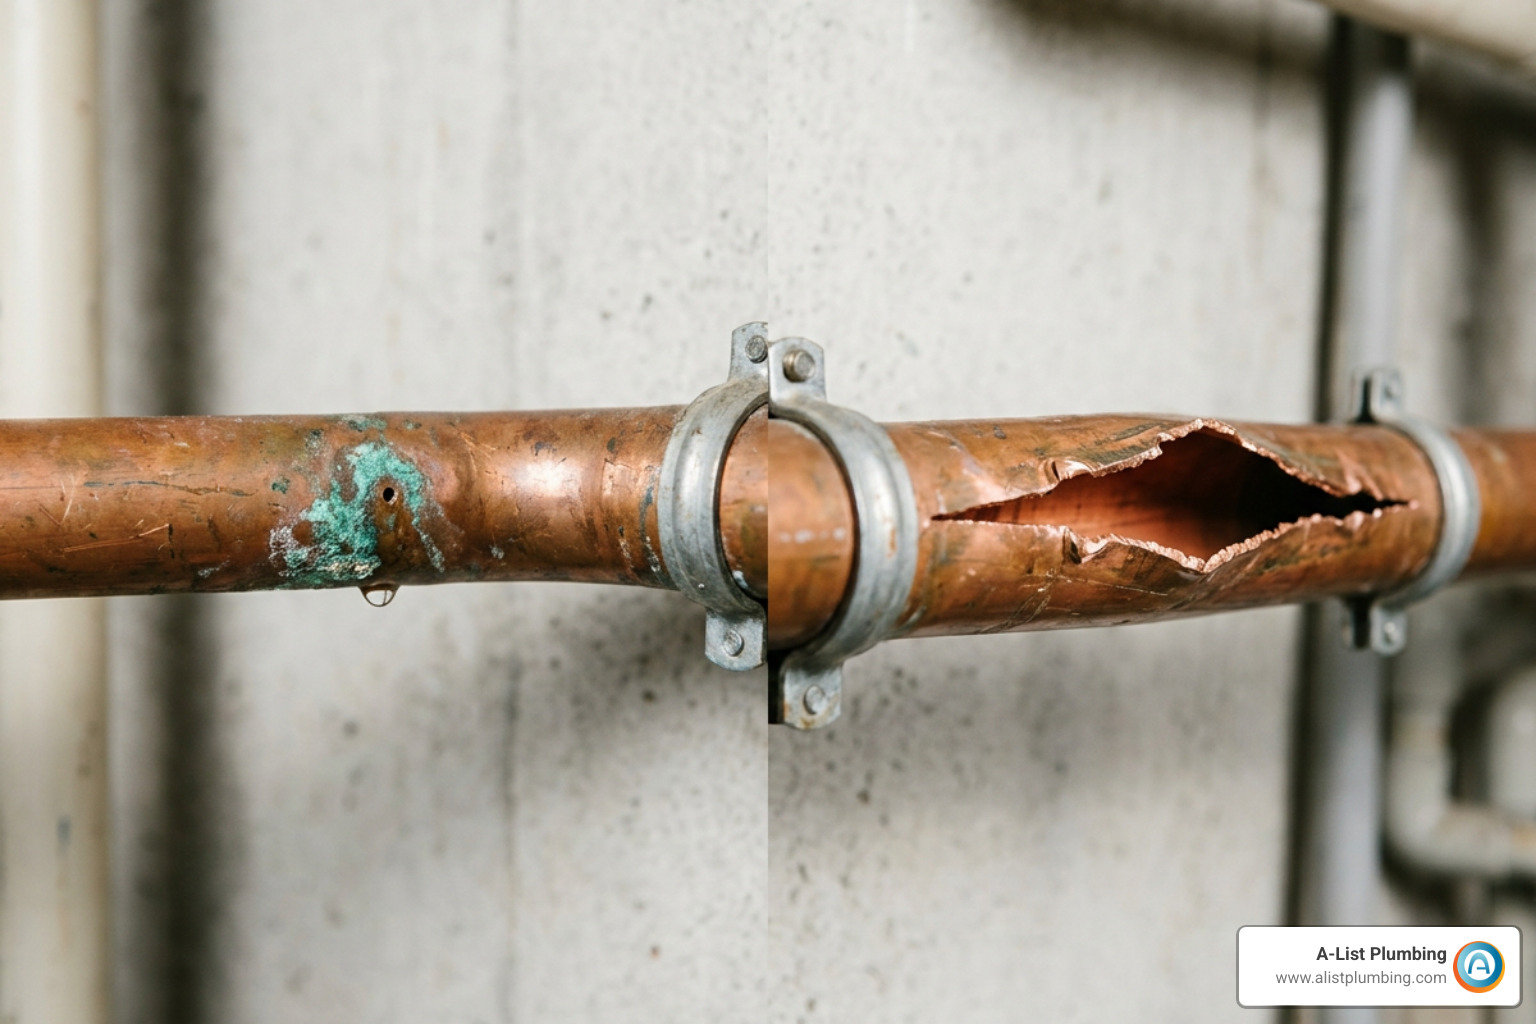
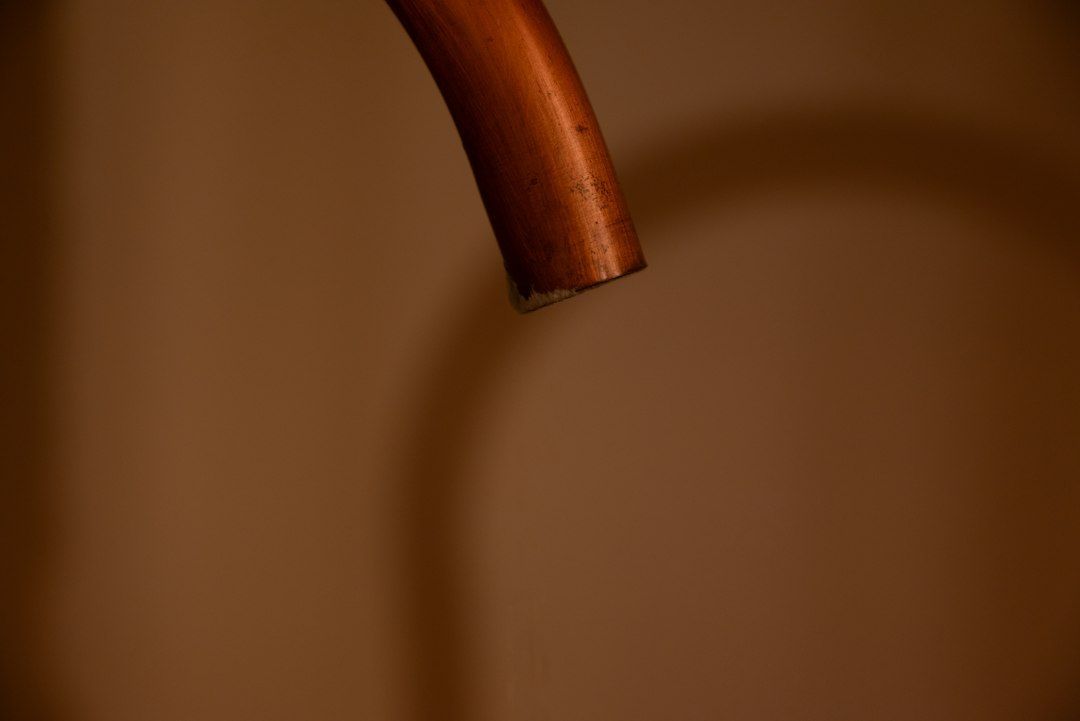
Not all copper pipe damage looks the same. A pinhole leak is tiny—often smaller than 1/8 inch—and stems from slow, sneaky corrosion. It might just be a faint spray or a damp patch on a wooden joist, but left alone, it'll quietly rot your framing.
Freeze damage is a whole different beast. When water freezes in an uninsulated pipe during a chilly Northwest winter, expanding ice rips the metal wide open along the seam.
If you see your Copper Water Pipe Leaking or hear a faint hiss behind a wall, go check your water meter with all faucets shut off. If the little dial or triangle is spinning, you've got an active leak that needs fast attention.
Preparation and Essential Repair Equipment
Before you grab your tools, you've got to make sure your workspace is bone-dry and safe to work in.
- Kill the water: Shut off your main house valve right away.
- Drain the lines: Turn on the lowest faucet in your house and open one on the top floor so air gets in and the water empties out fast.
- Clear your work area: If you need to Fix Leaking Pipe In Wall, carefully cut out drywall with a jab saw so you have a clean 6 to 8 inches of exposed pipe on both sides of the leak.
Essential Tools for Fixing a Hole in Copper Pipe
Having the right gear handy turns a potential nightmare into a quick 20-minute job:
- C-style tubing cutter or mini rotary pipe cutter
- Deburring and reaming tool
- Emery cloth or wire fitting brush (120-grit)
- Lead-free plumbing solder (95/5 tin-antimony alloy) and water-soluble flux paste
- Propane torch with a built-in igniter
- Flame-resistant heat shield cloth and a spray bottle filled with water
- Push-to-connect slip coupling (like a SharkBite Max) and disconnect clip
- Clean cotton rags
Proper Pipe Cutting, Deburring, and Surface Preparation
A clean cut is everything if you want a leak-free repair. Clamp your pipe cutter right next to the bad spot, snug it down, and spin it around the pipe, tightening the knob a quarter-turn every couple of spins until it cuts through cleanly. Never use a hacksaw—it leaves ragged burrs that will shred O-rings and ruin solder joints.
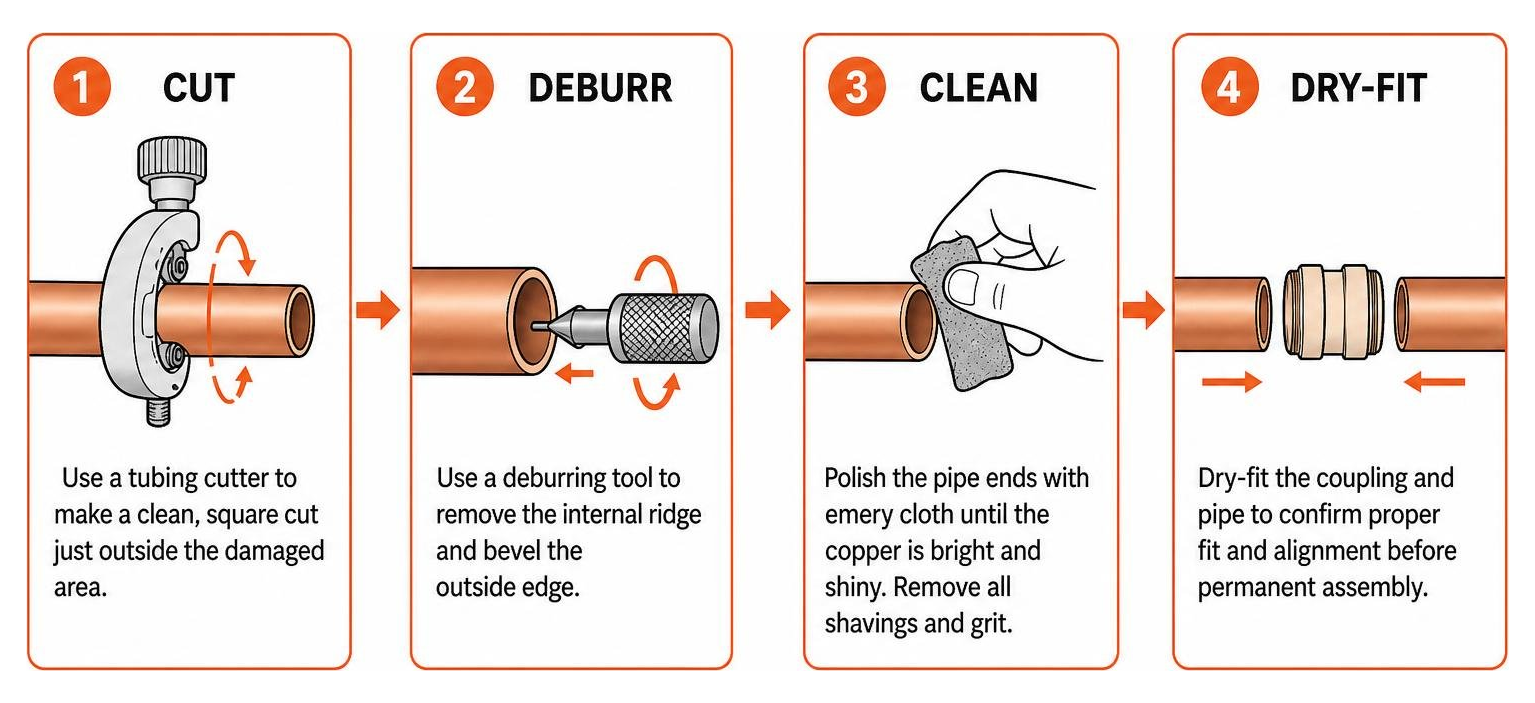
After making the cut:
- Ream out the inside burr and smooth the outer edge.
- Scrub the pipe ends with emery cloth until the copper looks brand new.
- Wipe away all shavings and dust.
- Make sure the inside is completely dry. If water keeps trickling down, you can follow this verified step-by-step sleeve replacement guide or plug the line with a wad of white bread. It holds back the moisture while you work and simply dissolves once you turn the water back on.
Step-by-Step Methods for Fixing a Hole in Copper Pipe
Once the pipe is clean, dry, and ready, pick the repair style that matches your comfort level and tools. Here is our walkthrough for the Best Way To Fix A Leaking Pipe, covering everything from quick push-fittings to traditional soldering.
Method 1: Push-to-Connect Slip Coupling (Fastest No-Solder Fix)
Push-to-connect fittings let you knock out a solid, code-compliant repair without firing up a torch. A standard coupling won't slide over rigid pipes, but a slip coupling is built specifically to slide all the way over copper lines.
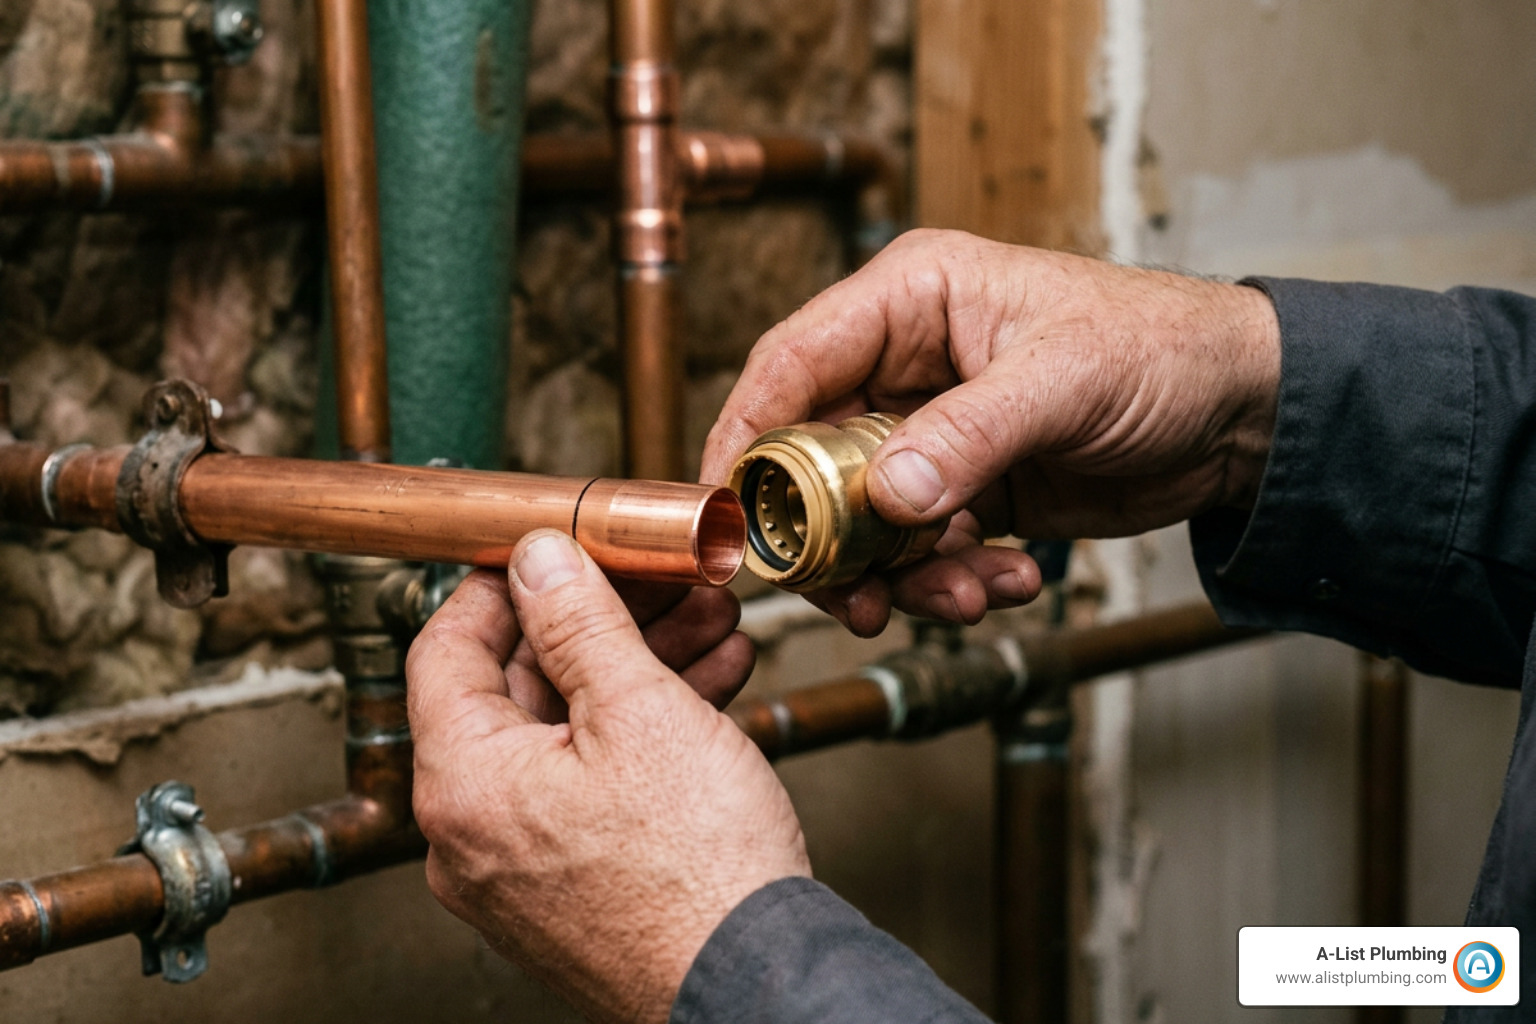
- Mark your cut: Measure and mark the pipe so you cut out no more than the fitting's slip limit (usually 1 to 2 inches).
- Cut and deburr: Cut out the damaged section and ream the edges smooth so you don't nick the inner O-ring.
- Mark the depth: Use a gauge or marker to mark the full insertion depth on the non-slip end (about 1 inch).
- Slide it on: Slip the fitting completely onto one side of the cut line.
- Snap it into place: Using your disconnect tool, slide the fitting back over the gap until it meets your depth mark. That's it—you're locked and sealed.
Method 2: Sweating a Coupling: Fixing a Hole in Copper Pipe with Solder
Sweating copper is still the gold standard for long-haul durability. If you need to Repair Burst Copper Pipe runs with standard sweat couplings, here's how to do it:
- Clean and flux: Polish the pipe ends and the inside of the coupling until they shine, then brush a thin coat of flux onto both pieces.
- Fit the joint: Slide the sleeve over the cut ends, ensuring at least 1/2 inch of overlap on both sides.
- Protect your walls: Stick a flame-resistant heat cloth behind the pipe to shield framing, and keep a water spray bottle right by your side.
- Heat the joint: Fire up your torch and aim the flame at the middle of the fitting cup—not directly on the solder wire.
- Feed the solder: Touch the solder wire to the side opposite the flame. Capillary action will suck the melted solder right in, forming a shiny silver seal around the edge.
- Cool and wipe: Let it cool on its own for a few minutes, then wipe away leftover flux with a damp rag so it doesn't corrode later.
Method 3: Emergency Temporary Clamps and Epoxy Putty
If a leak hits at 2 AM and you just need to keep things under control until morning, an Emergency Fix For Leaking Pipe will buy you valuable time.
- Pipe Clamps: Put a rubber gasket right over the hole, wrap the stainless clamp around it, and crank down the bolts with a wrench.
- Epoxy Putty: Shut off the water, dry the pipe completely, knead two-part epoxy putty until the color is totally uniform, mash it over the leak, and let it cure for 30 to 60 minutes before turning the water back on.
Temporary vs. Permanent Pipe Repairs: Cost and Longevity
Every fix has its pros and cons when it comes to cost, speed, and how long it'll actually hold up.
| Repair Method | Expected Lifespan | DIY Cost | Professional Cost | Best Application |
|---|---|---|---|---|
| Epoxy Putty | 1–3 Years | $8–$15 | N/A (Temporary) | Emergency pinpoint patches |
| Pipe Repair Clamp | 5–10 Years | $10–$25 | $150–$300 | Quick mechanical hold |
| Push-to-Connect (SharkBite) | 25 Years (Rated) | $20–$40 | $150–$350 | No-flame tight spaces |
| Soldered Copper Coupling | 20–50 Years | $15–$35 (DIY tools extra) | $150–$400 | Permanent gold-standard fix |
Checking out the total Cost To Fix Leaking Pipe helps you decide if a quick $20 DIY run makes sense, or if a temporary fix behind a finished wall carries too much risk of hidden water damage.
Preventing Future Copper Pipe Corrosion
Patching a hole stops the leak today, but taking care of your system saves you from major headaches down the road.
- Watch Your Pressure: Put in a pressure-reducing valve (PRV) if your water pressure is creeping over 80 PSI. High pressure churns up water and wears away copper tubing from the inside.
- Add Dielectric Unions: Don't connect copper directly to galvanized steel pipes or water heaters without dielectric fittings to prevent corrosion.
- Check Well Water: If you're on a well around Bothell or nearby rural areas, test for low pH and install an acid neutralizer if needed.
- Look at Long-Term Upgrades: If your lines are riddled with pinholes, using a basic Stop Leak For Water Pipes patch is just putting on a band-aid. Repiping older sections with PEX-a or fresh copper is your smartest long-term move.
Frequently Asked Questions About Copper Pipe Leaks
Why won't my copper pipe take solder during a repair?
Nine times out of ten, it's because there's still water in the pipe. Even a tiny trickle creates steam that soaks up all the heat from your torch, keeping the copper well below the 450°F to 500°F needed to melt solder. Make sure the pipe is completely drained and dry, scrub off all tarnish, and put on a fresh coat of flux before lighting the torch.
Are push-to-connect fittings approved for permanent repairs behind walls?
Yep! Modern push-to-connect fittings like SharkBite Max come with a 25-year rating and meet both the Uniform Plumbing Code (UPC) and International Plumbing Code (IPC) for permanent use inside closed walls without access panels, provided you prep and insert the pipe to the proper depth. That said, plenty of plumbers still prefer soldered joints behind drywall for extra peace of mind.
Is it safe to use a propane torch near wall studs and insulation?
It's totally safe as long as you take smart fire precautions. Always tuck a flame-resistant heat shield cloth behind the copper line, pull back any fiberglass insulation, mist the nearby wood framing with a spray bottle of water, and keep a working fire extinguisher right within arm's reach.
Conclusion
Tackling a small plumbing leak yourself is a great DIY win, but knowing when to call in a pro can save your home from serious damage. If your copper lines have crusty green buildup everywhere, multiple pinholes along a single line, or leaks tucked inside concrete slabs, a simple patch won't solve the real problem.
Our team at A-List Plumbing brings 22 years of real-world experience, fast emergency help, and upfront pricing to homeowners across Lynnwood, Edmonds, Shoreline, Bothell, and Seattle. Whether you need a fast solder fix or whole-home repiping, reach out to our licensed crew for verified, reliable A-List Plumbing broken pipes repair services to keep your place dry and running smoothly!