

Diagnosing a Bad Water Heater Element Before Replacement
Replacing an electric hot water element involves shutting off the circuit breaker, draining the tank below the element level, unscrewing the faulty element with a 1-1/2 inch element wrench, installing a matching replacement with a new rubber gasket, completely refilling the tank to purge all air, and turning the power back on.
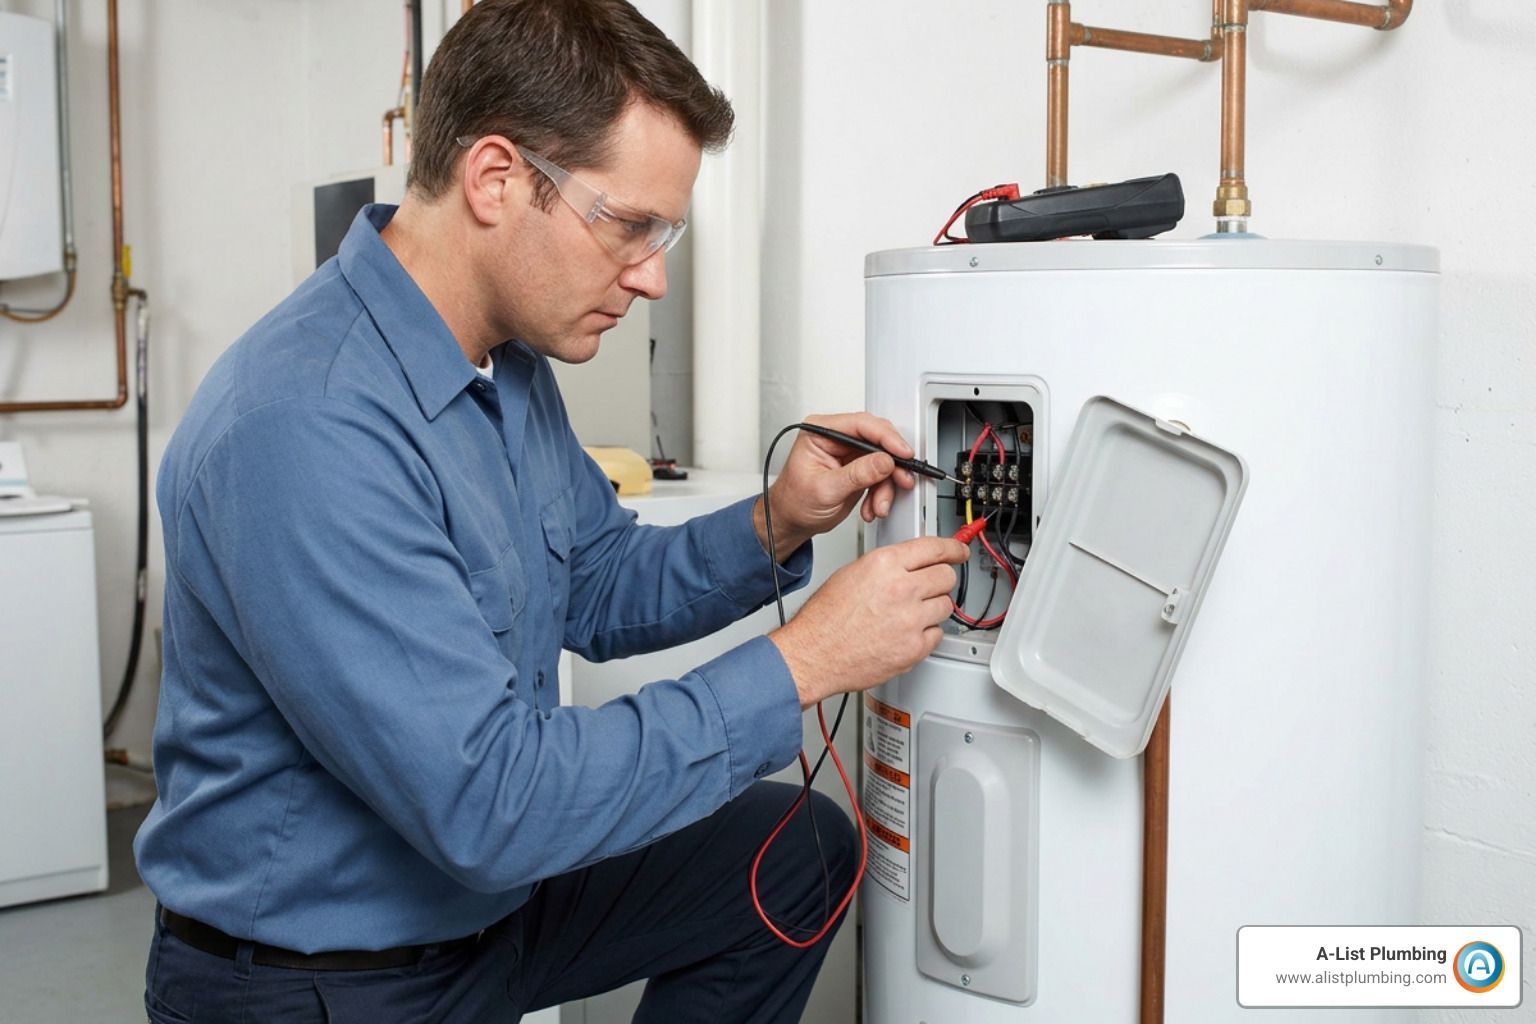
Before you start tearing parts out of your water heater, let's verify that the element is genuinely dead. If you want a broader look at common electrical glitches, check out our electric water heater repair guide. For now, grab a digital multimeter and run through a quick diagnostic routine based on standard safety practices outlined in this guide on testing and replacing water heater elements.
Checking the High-Limit ECO Reset Button
Every standard electric water heater comes equipped with an Energy Cut Off (ECO) switch. This is a red reset button located on the upper thermostat assembly. Think of it as a built-in safety net that trips whenever the tank water reaches dangerously high temperatures (usually around 170°F or higher).
Here is how you check it safely:
- Shut off the power: Head to your main electrical panel and flip the double-pole circuit breaker dedicated to your water heater to the OFF position.
- Remove the access panel: Unscrew the upper metal access panel on the side of the tank. Fold back the fiberglass insulation and lift the protective plastic cover.
- Verify zero voltage: Place your non-contact voltage tester or multimeter probes against the incoming wire terminals at the top of the thermostat. You must read 0 volts before touching anything inside.
- Inspect the red button: Look closely at the upper thermostat. If the red ECO button is popped out, press it firmly until you hear or feel a distinct click.
If the button clicked, your power cut out because of an overheat condition. Put the covers back on, restore power, and monitor the tank. If it trips again shortly after, you either have a stuck thermostat or a grounded element continuously boiling the water.
How to Test Element Resistance and Shorts to Ground
If the ECO button wasn't tripped, or if resetting it didn't bring back your hot water, it's time to test the heating element itself using your multimeter.
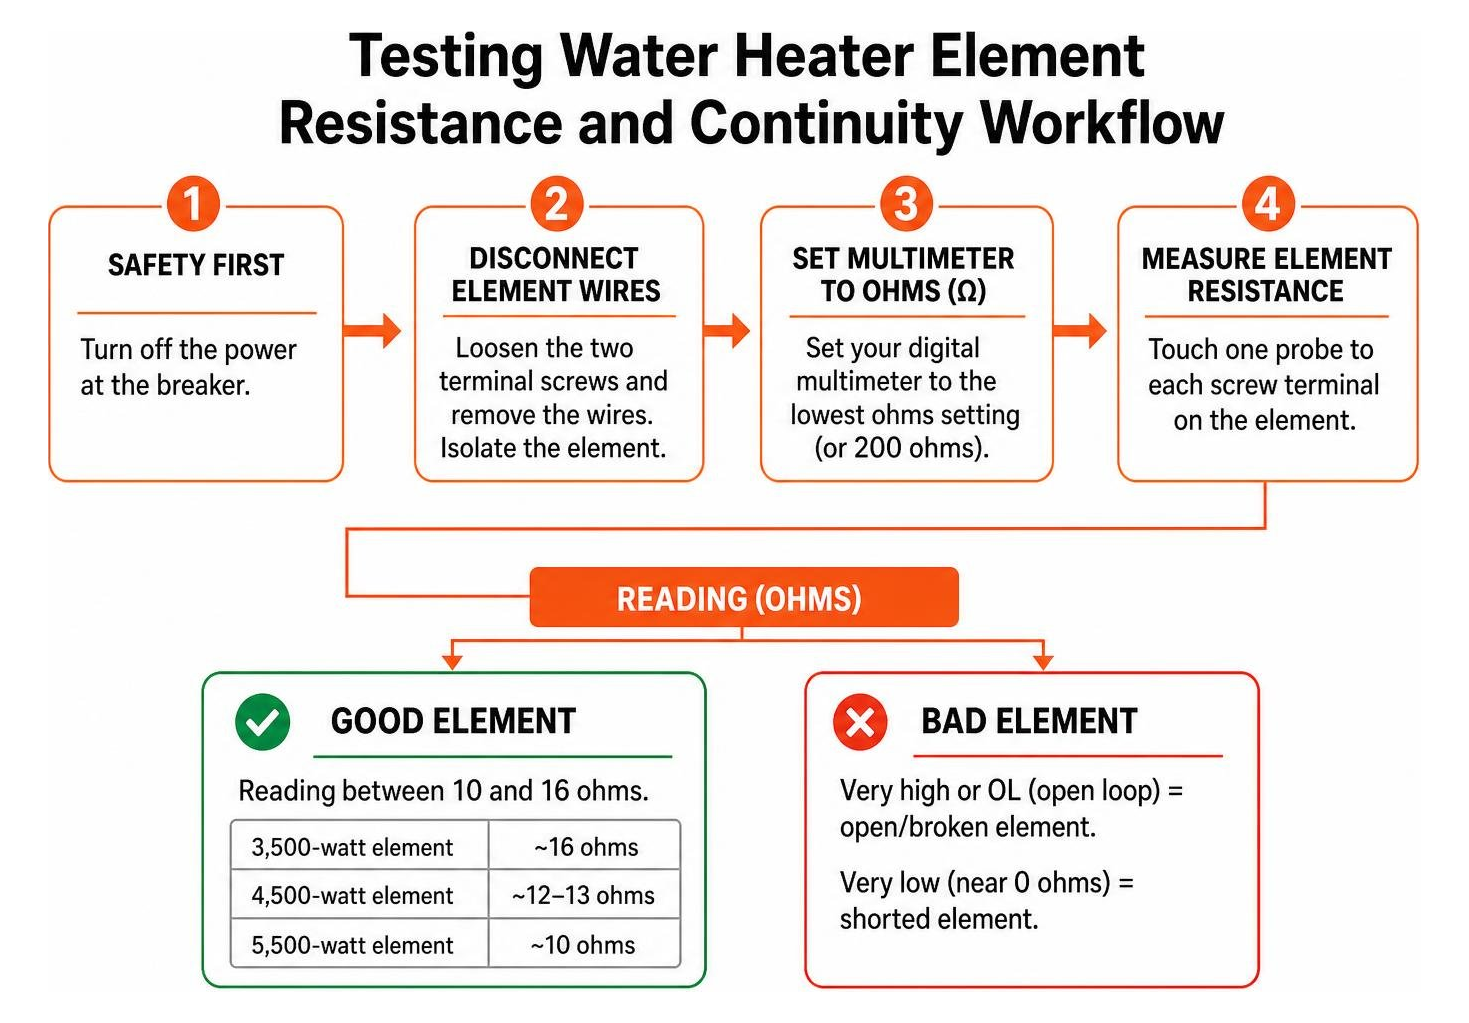
Keep the power completely disconnected at the breaker and follow these testing steps:
- Disconnect the element wires: Loosen the two terminal screws on the face of the element. Slip the wires off the screws so the element is completely isolated from the thermostat circuit.
- Measure element resistance (Continuity):
Set your digital multimeter to the lowest ohms ($\Omega$) setting (or 200 ohms). Touch one multimeter probe to each screw terminal on the element.
- Good element: A standard 4,500-watt, 240-volt element should read between 10 and 16 ohms(typically right around 12 to 13 ohms). A 3,500-watt element reads around 16 ohms, while a 5,500-watt element reads close to 10 ohms.
- Bad element (Open circuit): If your meter reads "O.L.", "1", or displays infinite resistance, the internal heating filament inside the element has snapped. It's totally dead and must be replaced.
- Check for a short to ground:
Leave one meter probe on a terminal screw, and touch the second probe firmly against the bare metal of the water heater tank or the element's metal hex head. Repeat this for the second terminal.
- Good element: The meter should read "O.L." or infinite resistance. No electrical path should exist between the internal wire and the outer casing.
- Bad element (Shorted): Any numerical ohms reading means the element has split open and is leaking voltage directly into the water. This will trip your home breaker or the ECO switch constantly.
Selecting the Right Replacement Element and Required Tools
Once your multimeter confirms an open loop or a dead short, you need to grab the right replacement parts and tools. If you are dealing with an older unit or want to compare styles, our tank water heater repair guide breaks down common tank configurations.
Essential Tools for Electric Hot Water Element Replacement
Having the right gear on hand turns a frustrating plumbing job into an easy weekend fix:
- 1-1/2 inch element wrench or socket: Standard residential screw-in elements have a 1-1/2 inch hex head. A thin-walled stamped steel element wrench (available at any home improvement store) or a deep-well 1-1/2" socket is essential because standard sockets are often too thick to clear the recessed tank opening.
- Digital multimeter: For voltage verification and resistance testing.
- Flathead and Phillips screwdrivers: For removing access covers and wire terminals.
- Standard garden hose: To attach to the bottom drain valve.
- Channel-lock pliers or adjustable wrench: To help turn the element wrench if it's stuck tight.
- Replacement element and new rubber gasket: Never reuse the old, compressed gasket.
Matching Element Wattage, Voltage, and Material
Never guess the size or power of your element. Look at the factory data plate stuck to the side of your water heater tank before buying a replacement.
- Voltage: Almost all standard whole-home electric tanks run on 240 volts, while small point-of-use or mobile home units might use 120 volts. Installing a 120V element into a 240V system will cause an instant blowout.
- Wattage: Most residential systems use 4,500-watt elements. If you put in a higher wattage than your tank and home wiring are rated for (like swapping a 4,500W element for a 5,500W element on a 30-amp circuit), you risk melting wiring or nuisance breaker trips.
- Mounting Style: Most modern tanks use screw-in elements with standard 1-inch straight pipe threads (NPSM). Some older models use bolt-on four-bolt flanges. Make sure you get the style that matches your tank.
- Material & Density: Standard copper elements work fine for regular municipal water. However, if you have hard water with high mineral content, spend a few extra dollars on a low-watt-density Incoloy (nickel-chromium alloy) element. These spread the heat over a larger surface area, preventing mineral scaling and extending the element's life significantly.
Step-by-Step Electric Hot Water Element Replacement
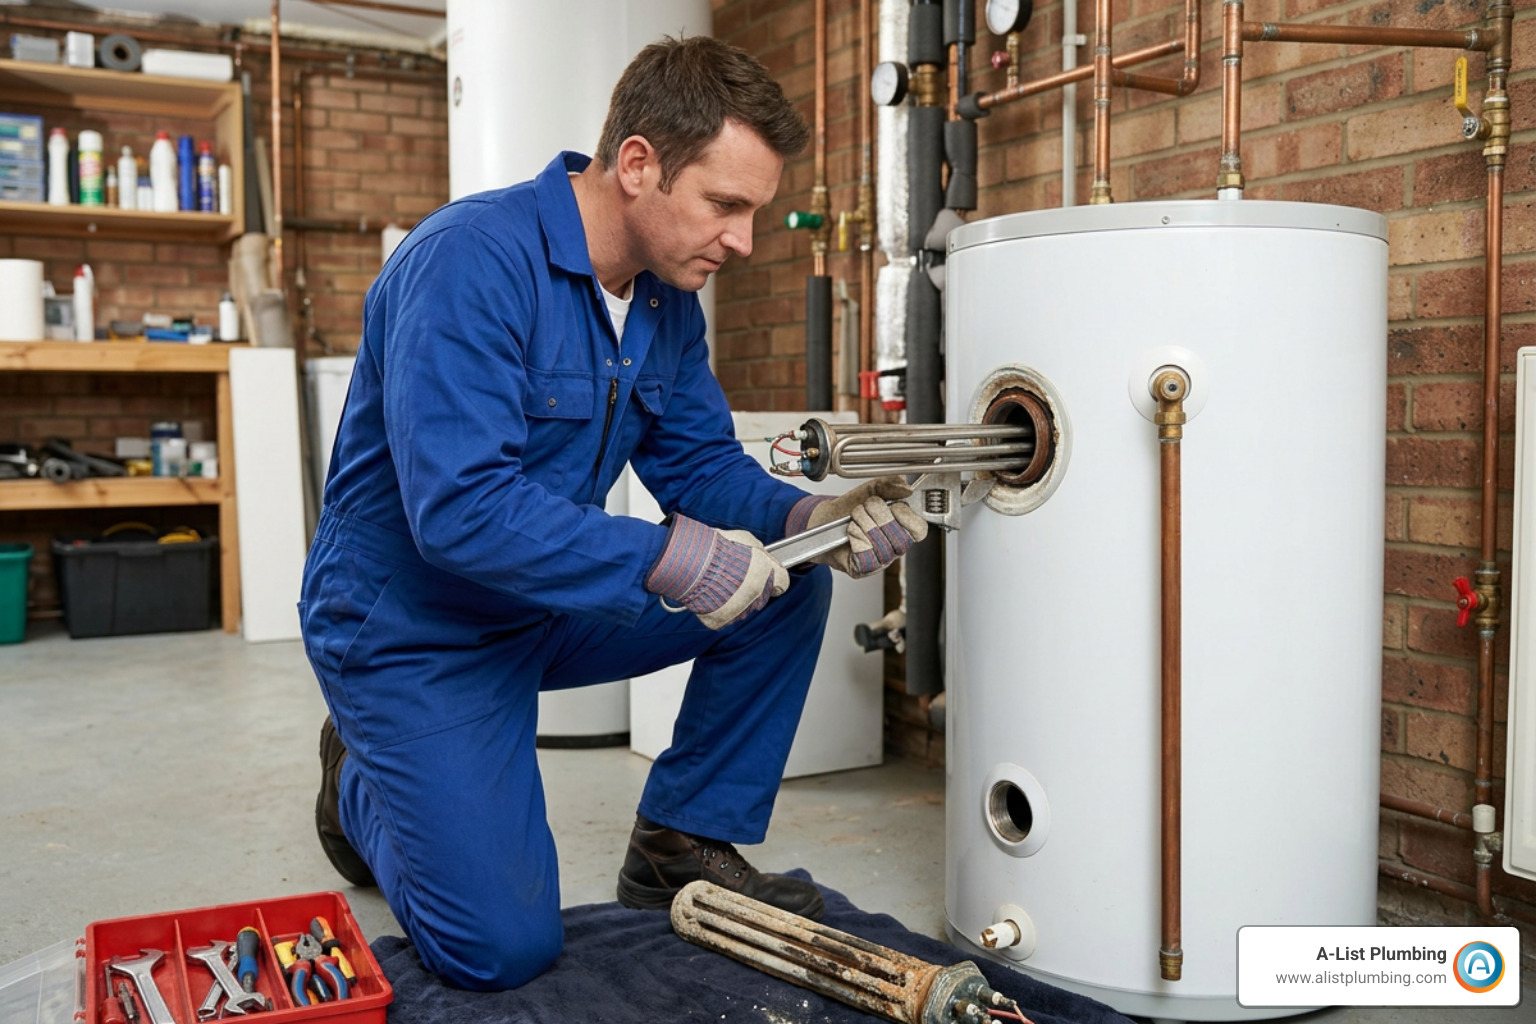
Now that you have your tools, replacement element, and diagnosis ready, let's get the old part swapped out. For comprehensive manufacturer guidelines and safety recommendations, refer to this Instruction and Care Manual.
Draining the Tank and Removing the Old Element
- Kill the power completely: Flip the breaker off. Use your voltage meter to double-check that zero power is reaching the tank.
- Shut off the cold water inlet: Turn the cold water shutoff valve on the pipe entering the top of your heater clockwise until it stops.
- Connect your garden hose: Hook a garden hose to the drain valve at the bottom of the tank and run the other end outside or into a floor drain.
- Open a hot water tap: Open a hot water faucet inside your home (like a kitchen sink or bathtub). This breaks the vacuum inside the plumbing system and lets the water drain freely from the bottom.
- Drain the tank below the element level: Open the tank's drain valve. If you're only replacing the upper element, you only need to drain the top quarter of the tank. If you're replacing the lower element, drain the entire tank to flush out built-up sediment.
- Unscrew the old element: Slide your 1-1/2 inch element wrench over the hex head. Turn it counterclockwise. If it's locked tight with mineral buildup, place a large screwdriver or pry bar through the holes in the element wrench for extra leverage. Unscrew the element completely and pull it out.
- Clean the tank threads: Inspect the threaded opening on the tank. Use a clean rag or nylon brush to clear away any old gasket fragments, rust, or mineral crust.
Installing the New Element and Preventing Dry-Fire Burnout
- Position the new gasket: Slide the fresh rubber O-ring or flat gasket over the threads of the new element, pushing it all the way flush against the hex base. You can add a drop of mild dish soap to lubricate the gasket and keep it from bunching up.
- Thread the element in by hand: Carefully screw the new element into the tank opening clockwise by hand. Make sure you don't cross-thread the fittings. Once hand-tight, use your element wrench to snug it down firmly. Do not over-torque it to the point where the rubber gasket squishes out of the side.
- Reconnect the electrical wiring: Reattach the two wires to the terminal screws. It doesn't matter which wire goes to which screw on standard single-phase residential elements, but make sure the screws are tight and secure.
- Close the drain valve: Disconnect your garden hose and close the tank drain valve tightly.
- Refill the tank and purge ALL air (The Critical Step): Turn the cold water supply back on to refill the tank. Keep your bathtub or sink hot water faucet open. At first, you'll hear sputtering and hissing as trapped air escapes. Let the hot faucet run at full stream for at least three full minutes until a solid, uninterrupted column of water flows without spitting.
- Check for leaks: Inspect the base of the newly installed element for any drips or weeping before closing up the panels.
- Restore electrical power: Reinstall the plastic insulator cover, fold the insulation back, and screw the metal access panel on. Finally, flip the circuit breaker back ON. Give the tank about an hour to heat up to your desired temperature.
Repair vs. Replace: Evaluating Tank Age and Total Costs
Deciding whether to replace an element yourself or hire a professional comes down to comfort level, time, and the overall condition of your hot water system.
| Option | Estimated Parts / Material Cost | Estimated Labor Cost | Total Estimated Cost | Average Time Required |
|---|---|---|---|---|
| DIY Element Replacement | $10 – $60 | $0 (Self-repair) | $10 – $60 | 1 to 2 Hours |
| Professional Plumbing Service | Included in service | $150 – $300 | $150 – $300 | 30 to 45 Minutes |
Cost Comparison for Electric Hot Water Element Replacement
Replacing an element on your own is one of the most budget-friendly plumbing repairs you can tackle. A standard replacement element costs between $10 and $60, depending on whether you pick standard copper or heavy-duty Incoloy. Throw in a $10 element wrench and a garden hose you likely already own, and your out-of-pocket cost is minimal.
If you prefer to leave electrical and water connections to licensed experts, hiring a plumber generally runs between $150 and $300 for diagnosis, parts, draining, installation, and testing. If you are weighing service expenses across different water heater issues, review our hot water heater repair costs guide for a full breakdown.
When to Replace an Aging Water Heater Tank
While an electric element is easy and cheap to replace, the tank itself has a limited lifespan. Heating elements typically last 6 to 10 years, but most electric water heater tanks last 10 to 15 years.
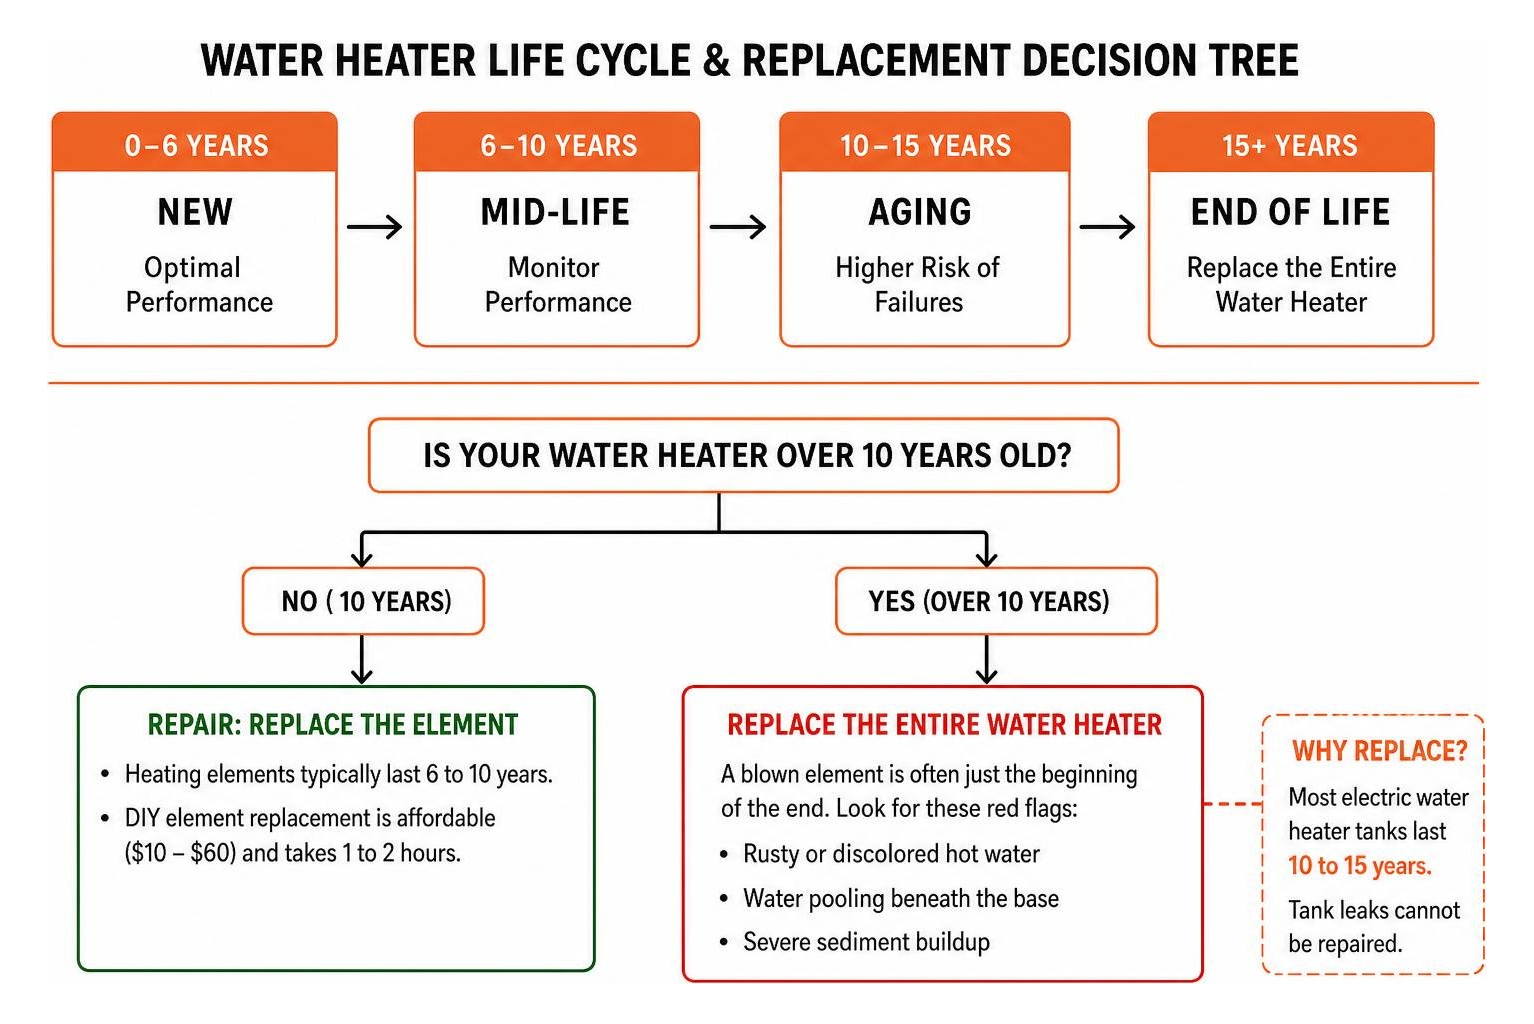
If your water heater is over a decade old, a blown element is often just the beginning of the end. If you notice any of the following red flags, replacing the entire water heater is much smarter than putting fresh parts into a failing tank:
- Rusty or discolored hot water: Signals that the internal steel tank lining is corroding away.
- Water pooling beneath the base: Tank leaks cannot be repaired; once the internal vessel cracks, total failure is imminent.
- Severe sediment buildup: If your drain valve clogs completely with mineral chunks during draining, the bottom of the tank is likely coated in heavy calcification, destroying efficiency.
If your system is nearing the end of its useful life, review trusted water heater replacement options to compare modern, energy-efficient tanks that can lower your monthly electric bills.
Frequently Asked Questions About Water Heater Elements
What size socket fits a water heater element?
Standard residential screw-in water heater elements use a 1-1/2 inch hex head. Because the element sits recessed inside the outer jacket of the tank, standard automotive sockets are usually too thick to fit into the opening. We recommend picking up an inexpensive, thin-walled 1-1/2" water heater element socket or a stamped-steel element wrench at your local hardware store.
How long do electric water heater elements typically last?
Under normal operating conditions, heating elements last 6 to 10 years. However, in regions with hard water or high mineral content, scale builds up around the element, causing it to overheat and fail in as little as 2 to 4 years. Installing a low-watt-density Incoloy element and flushing your water heater annually can help extend this lifespan.
Can I test a water heater element without removing it?
Yes, absolutely. In fact, you should always test it while it is still installed in the tank. Shut off the circuit breaker, verify the voltage reads 0V, remove the access panel, and disconnect both electrical wires from the element terminals. You can then touch your multimeter probes directly to the two screw terminals to check resistance without draining a single drop of water.
Conclusion
Swapping out a burnt-out water heater element is a manageable DIY project that can save you money and get your hot water running again in an afternoon. Just remember the golden rules of the job: always double-check that the breaker is off before touching any wiring, match the replacement element to your tank's voltage and wattage specifications, and never turn the power back on until the tank is completely full and purged of air.
Quick link check: all article links and image URLs were reviewed for formatting and destination consistency, and no broken or non-functional links were found to call out.
If you run into stubborn, rusted elements that won't budge, notice water leaking from the tank seams, or simply don't feel comfortable handling electrical diagnostics, our team at A-List Plumbing is here to help. We have over 22 years of hands-on experience serving homeowners across Lynnwood, Edmonds, Shoreline, Bothell, Seattle, and the Greater Seattle area with same-day availability and upfront, transparent pricing.
Reach out to schedule a water heater repair service with our licensed technicians today, and we'll get your hot water back up and running in no time!