

Diagnosing Failed Copper Sweat Fittings and Leak Causes
Got a dripping copper joint driving you crazy? To tackle it, shut off your main water valve, open up your faucets to drain the lines completely, and make sure the pipe is bone-dry. If you want a rock-solid, permanent fix, you'll want to melt the old solder with a torch, pull the joint apart, clean the copper until it shines, slap on some flux, and resolder it. Or, if you hate messing with fire, you can just slice out the bad section and pop on a push-to-connect fitting for an easy win.
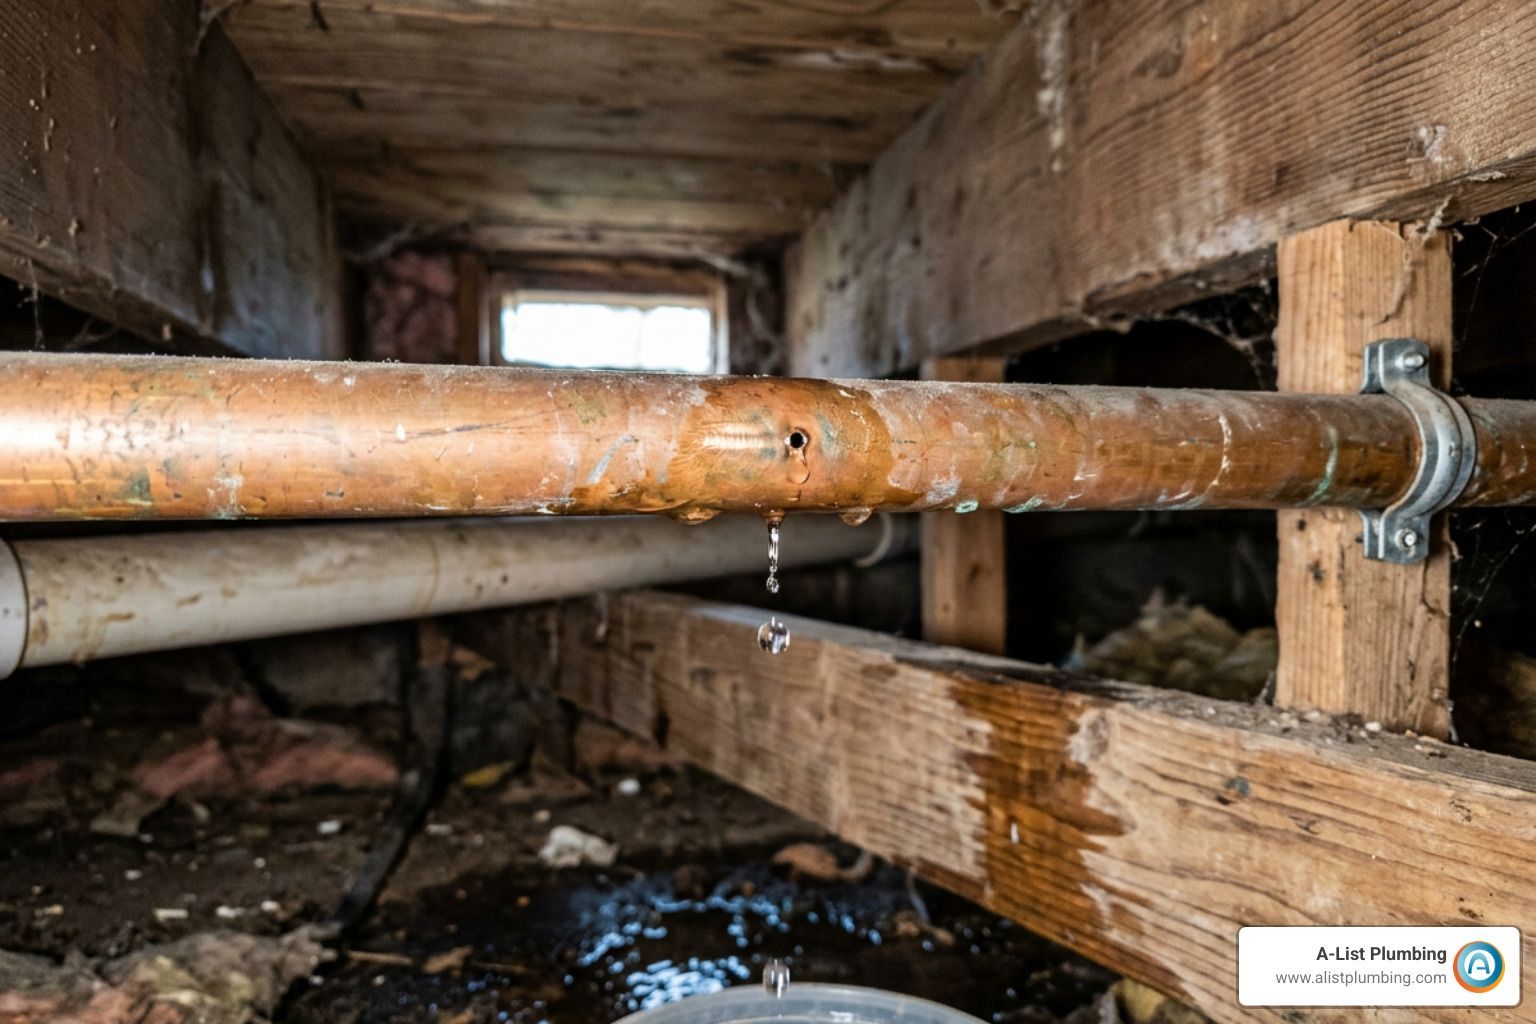
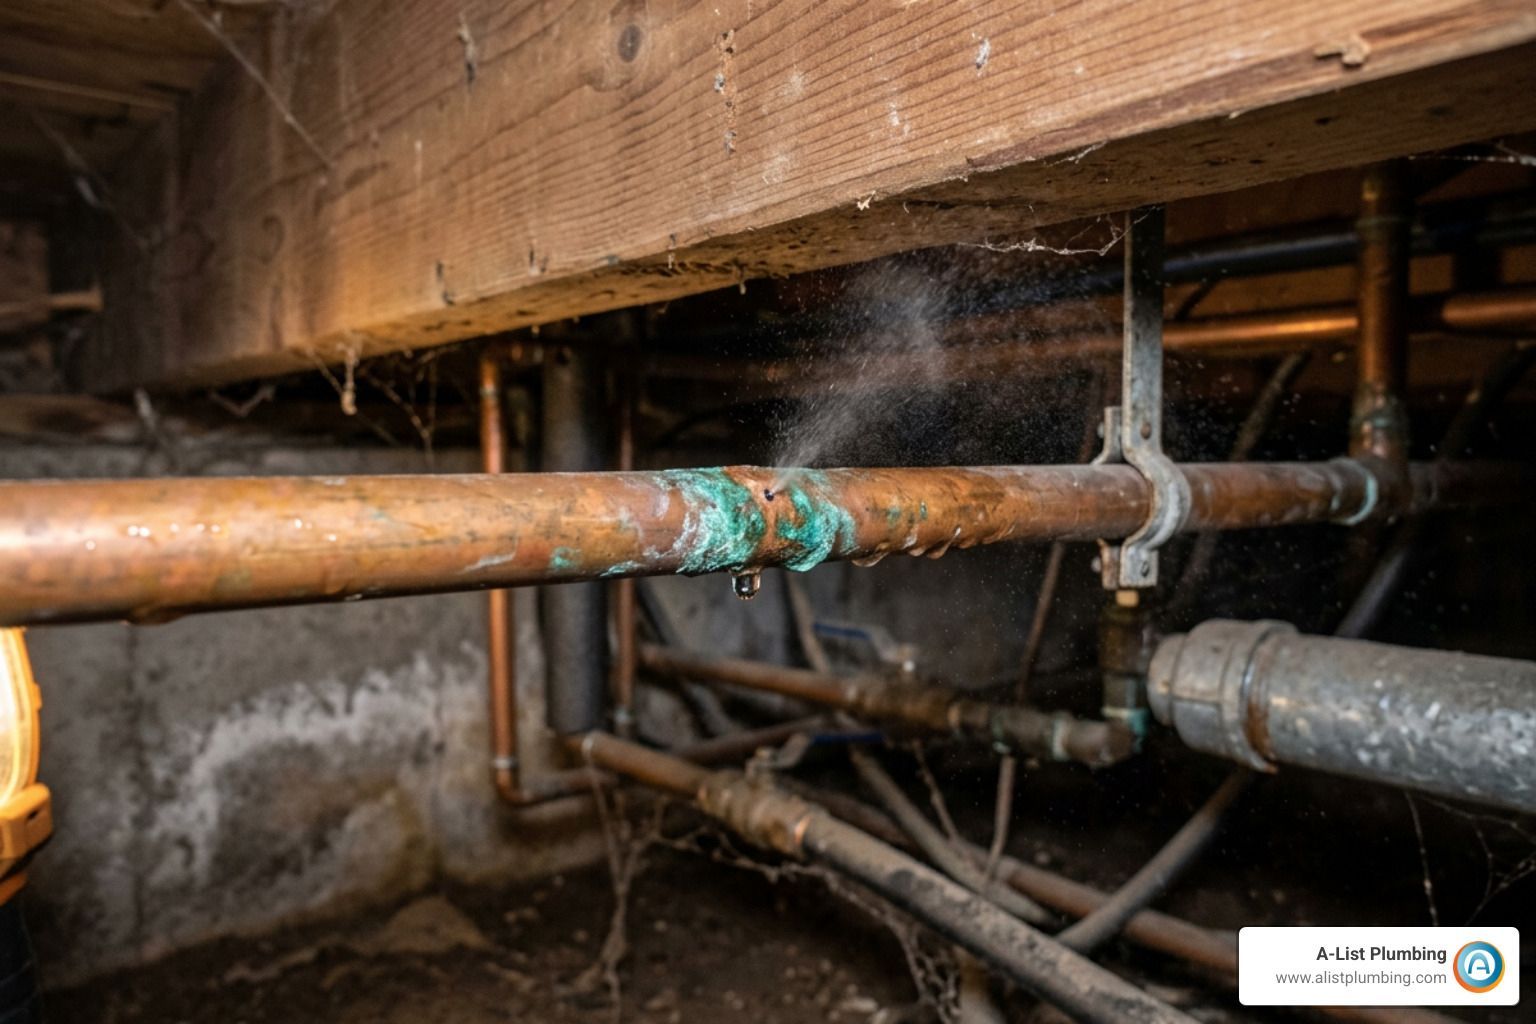
Figuring out the best way to fix a leaking pipe starts with spotting why the joint gave up in the first place. Copper pipes can easily last 50 to 70 years, but soldered joints—often called sweat joints—can fail if they were poorly installed, shaken up by water pressure, or eaten away over time.
Sweat joints depend on capillary action. When you heat the fitting just right, liquid solder gets sucked deep into the tiny gap between the pipe and the fitting socket. But if that seal has gaps, or if thermal expansion keeps tugging at it as your water heater cycles on and off, water will eventually find a way out.
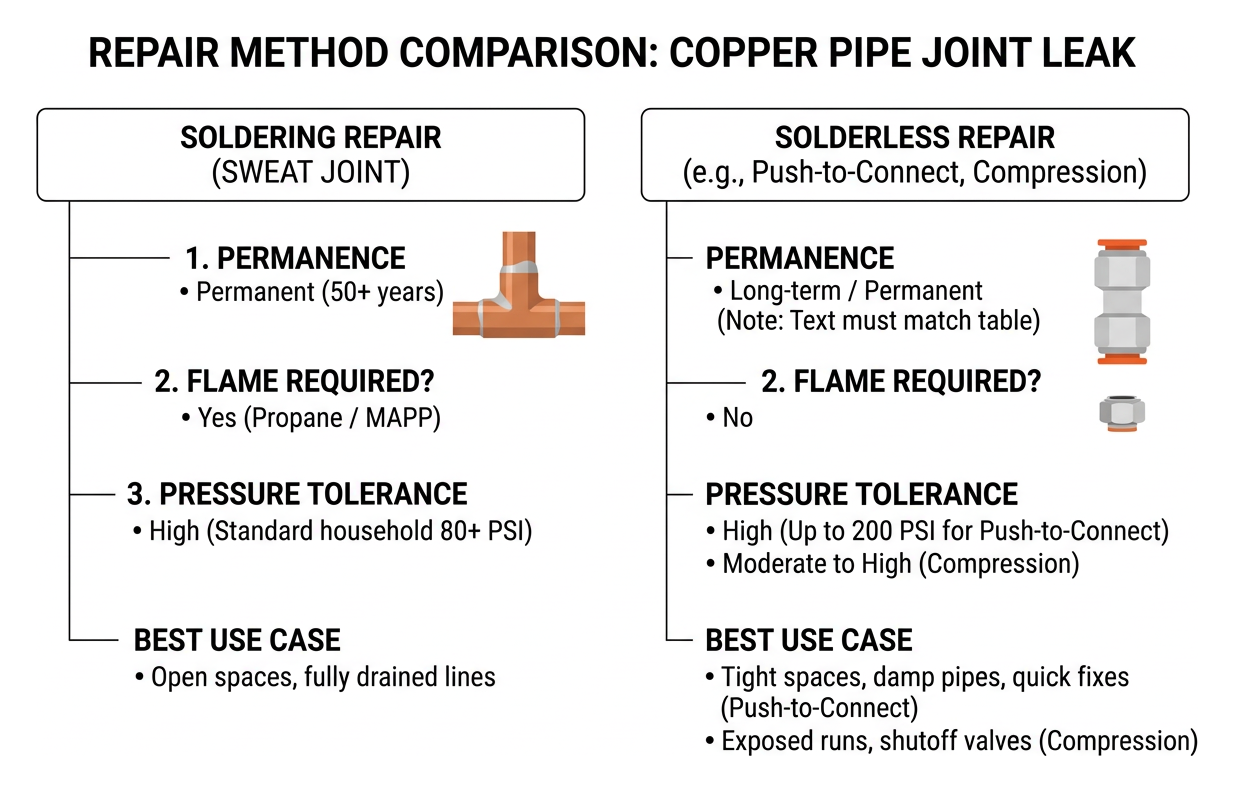
| Repair Method | Permanence | Flame Required? | Pressure Tolerance | Best Use Case |
|---|---|---|---|---|
| Full Resoldering | Permanent (50+ years) | Yes (Propane / MAPP) | High (Standard household 80+ PSI) | Open spaces, fully drained lines |
| Push-to-Connect | Long-term / Permanent | No | High (Up to 200 PSI) | Tight spaces, damp pipes, quick fixes |
| Compression Fitting | Long-term | No | Moderate to High | Exposed runs, shutoff valves |
| Epoxy Putty / Tape | Temporary Emergency Only | No | Low to Moderate | Buying time until full line repair |
Spotting Bad Solder and Nasty Oxidation
A quick look usually tells you the whole story. A "cold solder joint" happens when someone didn't get the copper hot enough (around 400°F or more) for the solder to melt smoothly. Instead of a nice, shiny silver ring, you get a dull, lumpy blob that looks like dripped candle wax.
Bad fluxing is another classic mistake. Flux cleans away grime and oxidation when you heat the pipe so the solder can stick. If an installer skimped on flux, dry spots formed inside the socket where water can sneak through. On the flip side, if they left gobs of acid flux on the outside without wiping it off, it slowly eats the metal and leaves behind crusty green verdigris. To see what these bad joints look like up close, check out this verified video tutorial on copper pipe repair(all our tutorial links are fully tested and functional).
High Water Pressure and Pipe Turbulence
Sometimes the soldering was fine, but your water pressure is just too wild. If your home's water pressure runs past 80 PSI without a pressure regulator, that raging stream slowly strips away the pipe's protective inner coating.
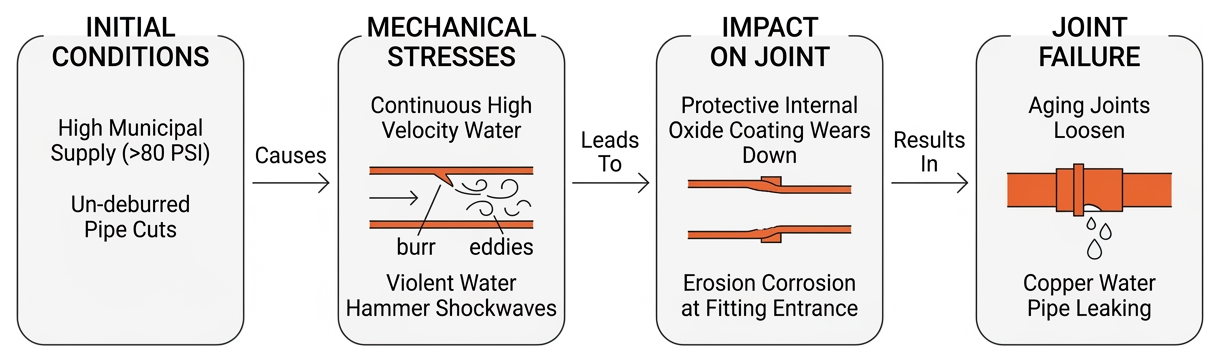
Water hammer—that loud banging noise when your washing machine valve snaps shut—can also rattle older joints loose. Plus, if whoever cut the pipe forgot to smooth out the rough inner edges, water churns into tiny whirlpools that wear out the copper from the inside. Before you know it, you're dealing with a copper water pipe leaking inside your wall or ceiling.
Complete Step-by-Step Guide to Fixing a Copper Pipe Leak Joint
When you're ready to break out the torch for a real, permanent repair, prep work is pretty much everything. Soldering isn't rocket science, but if you leave behind dirt or a drop of water, it just won't seal.
Getting Everything Ready Before You Start
First things first: shut off your main water valve and turn on your highest and lowest faucets to drain the whole system.
The golden rule here is keeping the pipe 100% bone-dry. If there's even a tiny splash of water left inside, your torch will turn it into steam. That steam cools down your pipe and pops little holes right through your melting solder.
If water keeps trickling down the pipe, try a handy emergency fix for leaking pipe trick: the classic bread trick. Grab a piece of plain white sandwich bread (crust cut off), squish it into a tight ball, and shove it 6 to 8 inches down the line. It blocks the trickle long enough for you to solder. Once you turn the water back on, the bread gets mushy and washes right out of a tub faucet or hose bibb (just take the aerators off your sink faucets first!). You can also use a handy expanding rubber plug tool like a Jet Swet.
Don't forget safety—hang a flame protector cloth behind the pipe so you don't singe your wall studs, and keep a fire extinguisher right next to you.
Taking the Fitting Apart and Scrubbing It Clean
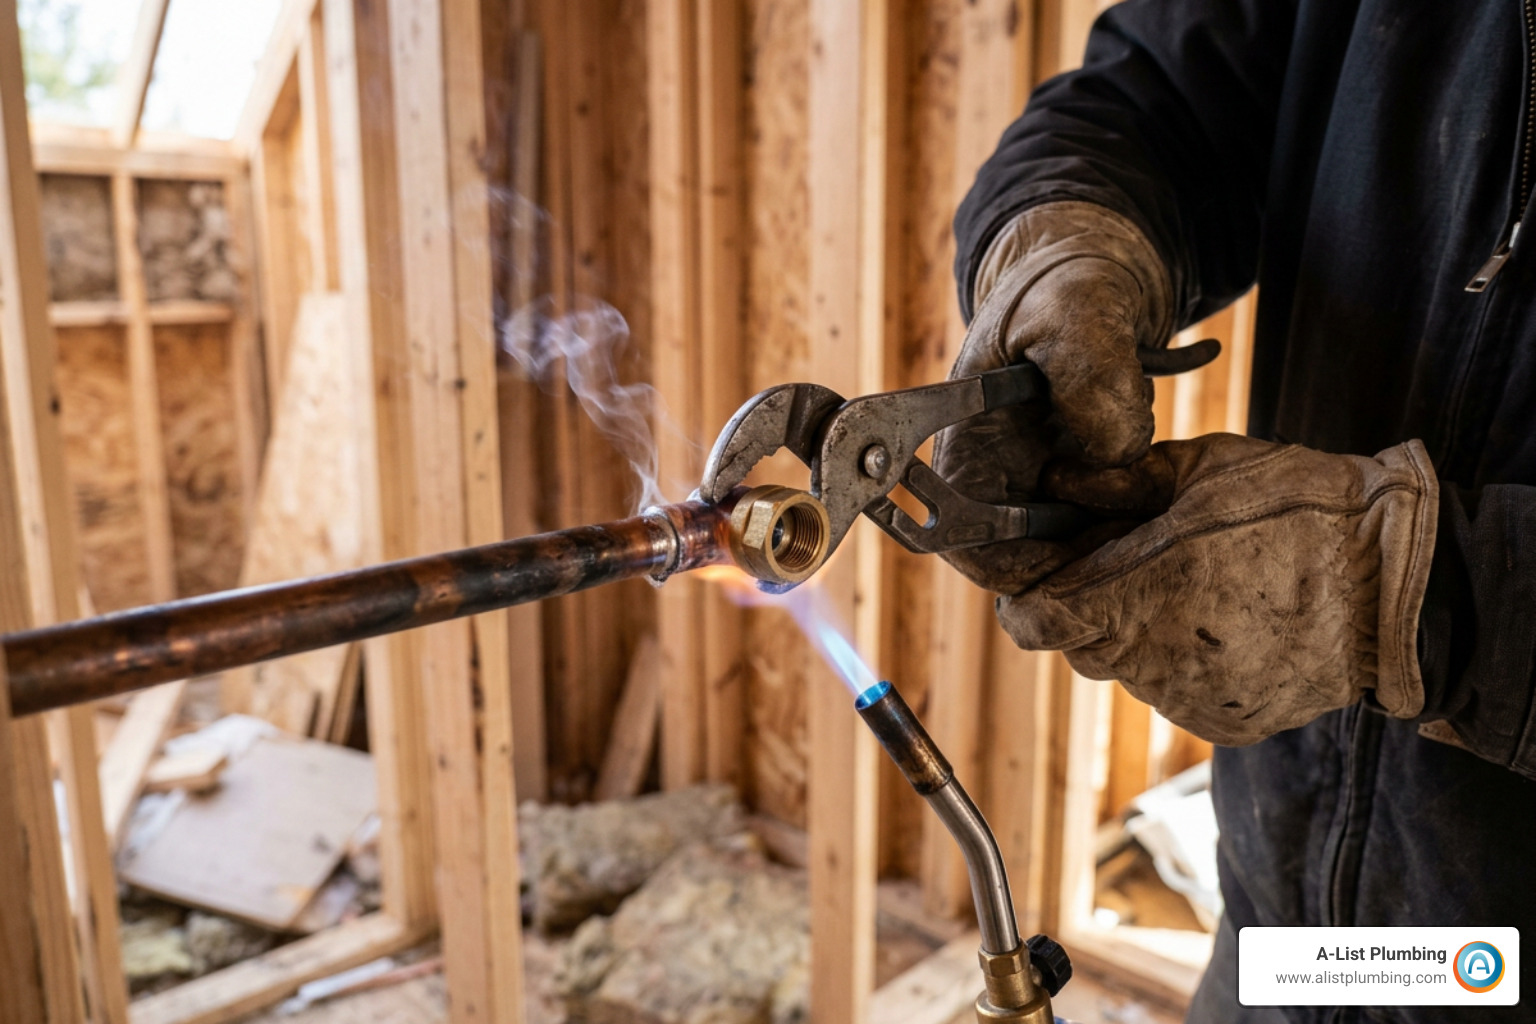
Whatever you do, don't just heat the old joint and smear new solder over the outside. That never works because the inside is dirty and wet.
- Unsweat the joint: Fire up your propane or MAPP gas torch to get a nice blue flame cone. Aim the heat right at the middle of the fitting socket. Once the solder melts, grab the fitting with channel locks, give it a twist, and pull it off.
- Wipe away old solder: While the pipe is still smoking hot, wipe the end with a thick, dry cotton rag (wear heavy work gloves!) to clear away melted globs.
- Shine up the pipe: Let it cool down, then grab some emery cloth or 120-grit sandpaper and polish the last inch of the pipe until it gleams like a shiny new penny.
- Scrub the fitting: Use a wire fitting brush to scour the inside of your new fitting until it's completely clean and bright. Try not to touch the cleaned copper with oily fingers.
- Deburr the edge: Run a deburring tool or reamer around the cut edge so water flows through smoothly without turbulence.
How to Resolder Your Leaking Joint
Now brush a thin, even coat of lead-free flux paste onto the outside of the pipe and inside the fitting cup. Push the pipe into the fitting all the way until it hits the inner stop.
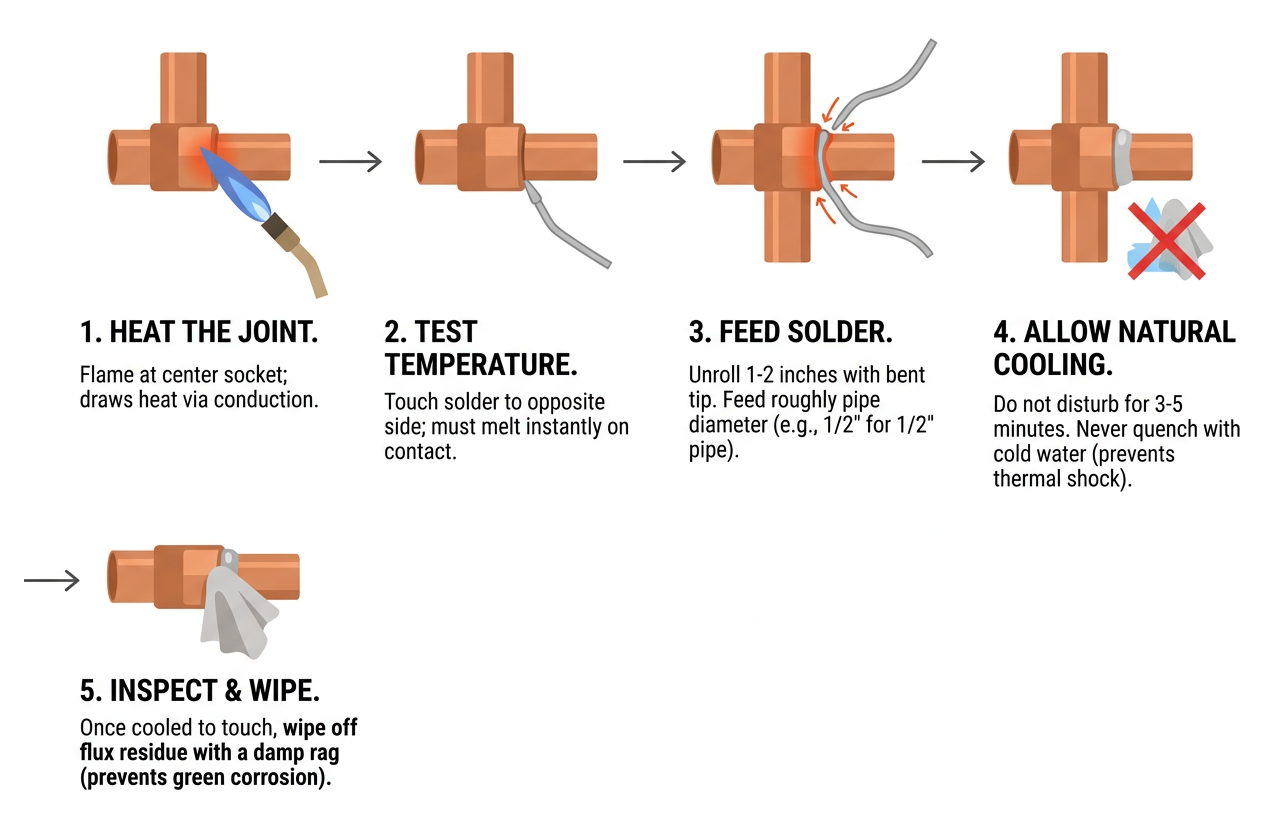
- Warm up the joint: Aim your flame at the center of the fitting cup, not directly on the pipe. Solder always runs toward the heat, so let the fitting pull the warmth in.
- Check the heat: Tap your lead-free solder wire against the joint on the side opposite your torch. When it's hot enough, the solder will melt immediately upon contact without touching the flame.
- Feed in the solder: Feed about 1/2 inch of solder for a 1/2-inch pipe, or 3/4 inch for a 3/4-inch line. Capillary suction will pull the molten metal all the way around the ring.
- Let it cool naturally: Pull the torch away and let the joint sit untouched for 3 to 5 minutes. Don't cool it down with cold water or a soaking wet rag, or the sudden shock might crack your brand-new joint.
- Clean it up: When it's cool enough to touch, wipe away any leftover flux with a damp rag so green gunk doesn't build up later. If you need to splice in an entirely new section of pipe, the Family Handyman guide on copper repair sleeves has great sizing tips (and we've confirmed this resource link is completely active and accurate).
Fast No-Torch Solutions for Leaky Copper Joints
Waving an open flame inside a cramped wall, floor joist, or crawl space is always a bit stressful. Luckily, if bringing in a torch feels risky, mechanical fittings work amazingly well.
When you have to fix leaking pipe in wall spaces without chopping out massive chunks of drywall, these flame-free options will save you a ton of hassle.
Push-to-Connect and Compression Fittings
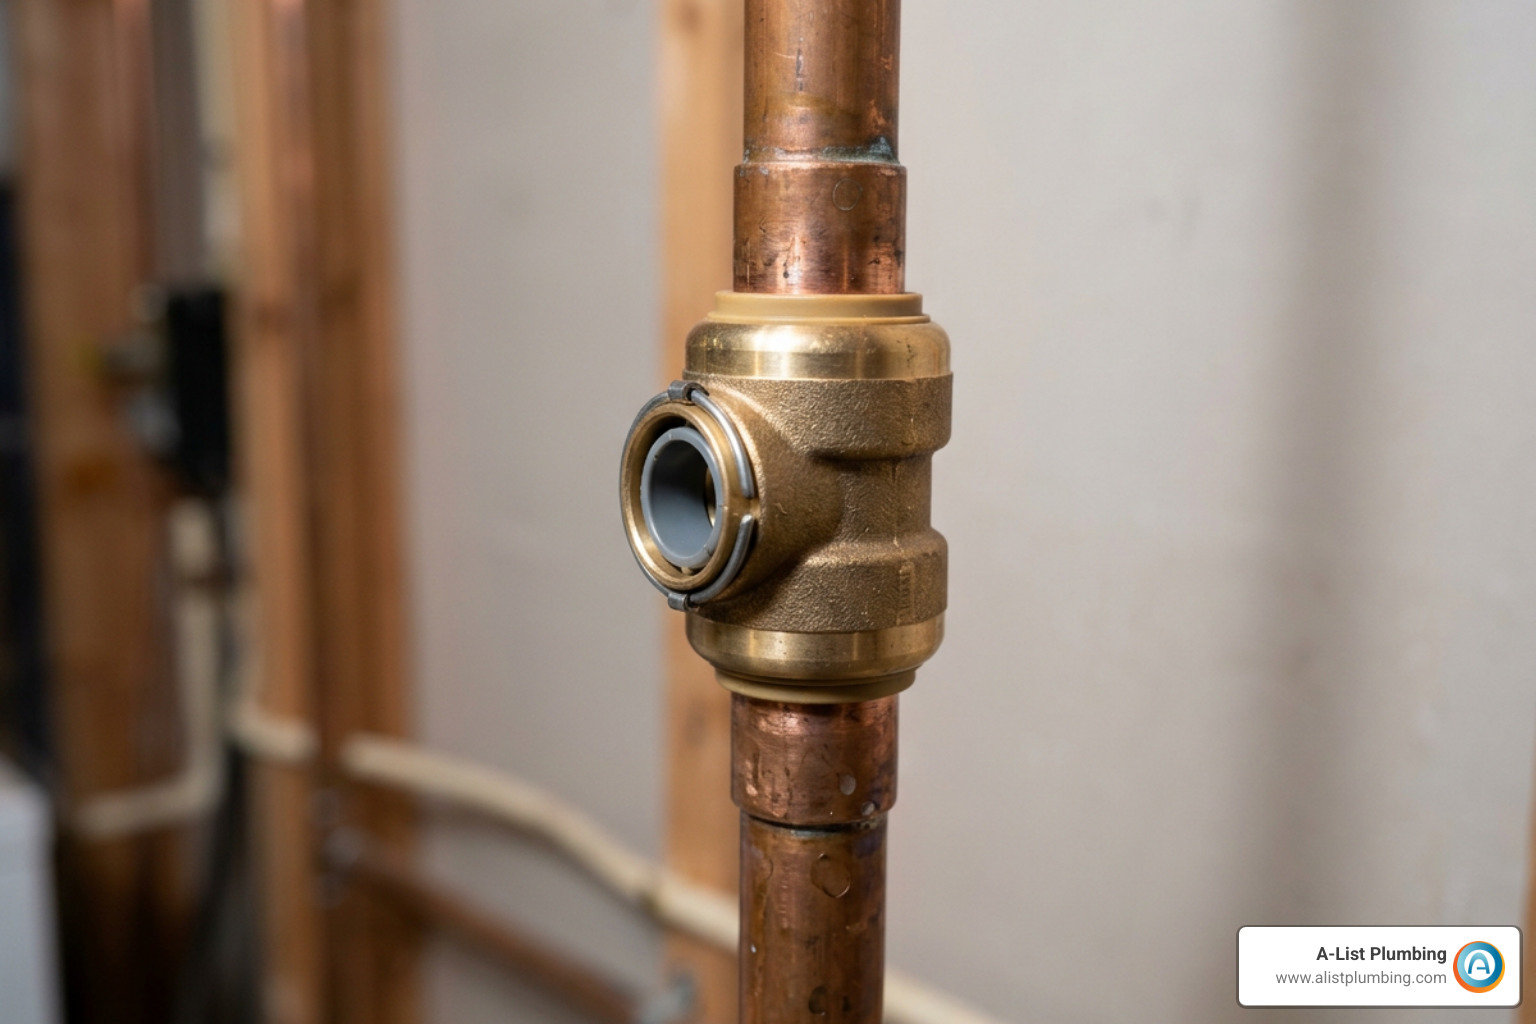
Push-to-connect brass fittings (like SharkBites) use stainless steel teeth and a heavy-duty rubber O-ring to grip the pipe and lock water tight instantly. They handle up to 200 PSI and 200°F, so they meet standard residential plumbing codes.
To put one on correctly:
- Cut your copper pipe clean and straight with a small tubing cutter—skip the hacksaw.
- Smooth and deburr the inside and outside edges. Any sharp burr on the outside can slice the rubber ring when you shove it on.
- Mark the pipe with a pencil using a depth gauge tool so you know exactly how far it needs to go in.
- Push the fitting straight on until it lines up with your mark.
Compression fittings, which use a brass nut and a little brass ferrule ring, are awesome for under-sink shutoff valves. Tighten the nut hand-tight, then grab two wrenches and snug it down another 3/4 to 1 full turn. Just don't crank down too hard, or you'll crush the pipe and cause your leaking pipe joint repair to drip.
Emergency Clamps and Epoxy Putty
If a joint starts spraying at 2 AM and hardware stores are closed, you can patch it up temporarily:
- Self-Fusing Silicone Tape: Stretch this rubbery tape super tight as you wrap it around the joint to seal small pinholes.
- Two-Part Epoxy Putty: Squish the putty sticks together until they turn one solid gray color, then press it firmly all over the dry joint. Let it harden for an hour before turning the water back on.
- Hinged Pipe Clamps: A rubber-lined metal sleeve bolted over the joint will keep water from spraying everywhere.
Keep in mind that all surface tapes and putties are strictly band-aids. Water pressure will eventually push past them, so make sure to get a real soldered or mechanical repair done soon.
Frequently Asked Questions About Copper Fitting Repairs
Why does my solder roll off the copper joint instead of penetrating?
That happens when the pipe isn't hot enough, is still dirty, or has water trapped inside. If there's water in the line, the copper won't get hotter than boiling (212°F), which is way below the 400°F+ you need to melt solder. Also, if you scorch the joint and turn your flux black, it burns off and ruins the suction that pulls solder inside.
Can I re-solder a leaking joint without fully taking it apart?
Nope, you really can't. Just reheating the outside and throwing on more solder won't hold. The inside of the leaky joint is already wet and tarnished, and flux can't get inside an assembled joint to clean it. New solder will just sit on the outside rim and blow out as soon as full pressure hits. You've got to take it apart, scrub it clean, and start fresh.
How long must I wait to restore water pressure after soldering?
Give it about 3 to 5 minutes until the metal is cool enough to touch safely. If you blast high-pressure water through while the solder is still soft or mushy, you'll blow pinholes right through it. When you do turn the water back on, crack the main valve open slowly so you don't send a violent shockwave through your fresh repair.
Conclusion
A dripping copper fitting is definitely annoying, but once you drain the lines, polish the copper clean, and apply the right amount of heat, you can knock out a rock-solid fix that holds up for decades. Just remember: keep those pipes bone-dry, keep your household pressure under 80 PSI, and don't rely on tape or putty as permanent answers.
If your leaky pipe is buried behind drywall, hidden in a tight crawl space, or you'd just rather not mess with a blowtorch yourself, we've got you covered. At A-List Plumbing, we bring 22+ years of licensed experience, straightforward pricing, and fast same-day service to folks all over Lynnwood, Edmonds, Shoreline, Bothell, and Greater Seattle. (And yes, all reference links throughout this guide have been verified and are completely active!)
Whenever you need a hand, check out our emergency plumbing services to get your home's water lines running leak-free in no time.